Sunday, December 27, 2015
Thursday, November 26, 2015
Fedora 23 and Wacom Cintiq as Secondary Display
Fedora 23 recognized most of things automatically for Wacom Cintiq and Krtia works out of box with most settings as default.
However, I could not find how to make Cintiq as a secondary display and able to draw on it directly. There is not UI button for it. Setting the Cintiq as a secondary display only make the Cintiq monitor itself as a secondary, however, the stylus detection still map to the primary screen.
After some Google search and debugging, found following post
which explains in great detail how to handle it.
However, when I run it, it failed with following error
Cannot find device 'Wacom Cintiq 13HD stylus'.


Cannot find device 'Wacom Cintiq 13HD eraser'.
I then use xsetwacom to find the devices real name
It then display as
So I modified the script as following
Re run the script, and it works this time
xsetwacom --list devices
Wacom Cintiq 13HD Pen stylus id: 14 type: STYLUS

Wacom Cintiq 13HD Pen eraser id: 15 type: ERASER

Wacom Cintiq 13HD Pad pad id: 16 type: PAD
So I modified the script as following
#!/bin/bash## Toggles which screen the cintiq is mapped to.if [ "$(cat ~/.wacom-mapping)" -eq 0 ];thenecho 1xsetwacom set "Wacom Cintiq 13HD Pen stylus" MapToOutput "HEAD-1"xsetwacom set "Wacom Cintiq 13HD Pen eraser" MapToOutput "HEAD-1"echo 1 > ~/.wacom-mappingelseecho 0xsetwacom set "Wacom Cintiq 13HD Pen stylus" MapToOutput "HEAD-0"xsetwacom set "Wacom Cintiq 13HD Pen eraser" MapToOutput "HEAD-0"echo 0 > ~/.wacom-mappingfi
Re run the script, and it works this time
[localhost ~]$ wacom-toggle-mapping1
Sunday, November 8, 2015
Update from Fedora 22 to Fedora 23 with Nvidia Proprietary Driver
I decided to upgrade my own workstation to Fedora 23 from Fedora 23 this weekend. After going through some struggles, I thought I will write down some of my steps so people can reference in case they hit similar obstacles.
Please note that I am not responsible for anything case by the info in the article and the article is provided as is.
Please also note not all info is coming from me. Some of them is found on the referenced article stated in there.
Perform Upgrade
I followed following guide:
https://fedoramagazine.org/upgrading-from-fedora-22-to-fedora-23/
The only thing that I did different from the article is that I hit error that mention nvidia drive from rpmfusion cannot be upgraded. So I did following
However, after the update is complete, when I tried to install nVidia proprietary driver, but facing following issue:
nVidia Driver is not compatible with Fedora 23 as Fedora 23 includes X.Org 1.18 release candidate version
https://ask.fedoraproject.org/en/question/77564/fedora-23-nvidia-proprietary-driver/
To overcome it, I following article
http://rglinuxtech.com/?p=1598
Follow the article to install nVidia
http://rpmfusion.org/Howto/nVidia
However, after reboot, I found the GDM screen shows up, but no user login prompt. After some research, I found following article
https://ask.fedoraproject.org/en/question/77555/fedora-23-gnome-login-issues/
which seem to indicate that GDM not working with nVidia driver (it seem true, if I remove all nVidia package, the GDM shows up correctly).
As a workaround, I use lightgdm to login
https://ask.fedoraproject.org/en/question/37728/unable-to-login-after-upgrade/
On the login screen, press
Please note to remove the change on
I did use nVidia proprietary driver because my nVidia card did not support by open source driver and only have software render, which is too slow to use on Krita.
Please note that I am not responsible for anything case by the info in the article and the article is provided as is.
Please also note not all info is coming from me. Some of them is found on the referenced article stated in there.
Perform Upgrade
I followed following guide:
https://fedoramagazine.org/upgrading-from-fedora-22-to-fedora-23/
sudo dnf upgrade
sudo dnf install dnf-plugin-system-upgrade
sudo dnf system-upgrade download --releasever=23 --best
The only thing that I did different from the article is that I hit error that mention nvidia drive from rpmfusion cannot be upgraded. So I did following
sudo dnf erase *nvidiaand then redo
sudo dnf system-upgrade download --releasever=23 --best
sudo dnf system-upgrade rebootAfter that, I am able to successfully update.
However, after the update is complete, when I tried to install nVidia proprietary driver, but facing following issue:
nVidia Driver is not compatible with Fedora 23 as Fedora 23 includes X.Org 1.18 release candidate version
https://ask.fedoraproject.org/en/question/77564/fedora-23-nvidia-proprietary-driver/
To overcome it, I following article
http://rglinuxtech.com/?p=1598
sudo dnf --allowerasing --releasever=22 downgrade xorg-x11-server-Xorg
sudo cat exclude=xorg-x11* >> /etc/dnf/dnf.conf
Follow the article to install nVidia
http://rpmfusion.org/Howto/nVidia
sudo cat exclude=xorg-x11* >> /etc/dnf/dnf.conf
sudo reboot now
However, after reboot, I found the GDM screen shows up, but no user login prompt. After some research, I found following article
https://ask.fedoraproject.org/en/question/77555/fedora-23-gnome-login-issues/
which seem to indicate that GDM not working with nVidia driver (it seem true, if I remove all nVidia package, the GDM shows up correctly).
As a workaround, I use lightgdm to login
https://ask.fedoraproject.org/en/question/37728/unable-to-login-after-upgrade/
On the login screen, press
ctl + Alt + F2Login as a user that have sudo previlige
sudo dnf -y install lightdm system-switch-displaymanager
sudo system-switch-displaymanager lightdm
sudo reboot nowAfter that, it should have lightdm to prompt login and one should have Fedora 23 + nVidia proprietary driver.
Please note to remove the change on
sudo cat exclude=xorg-x11* >> /etc/dnf/dnf.confOnce there is an offical X.Org 1.18 release and offical nVidia release to support it. (Also switch back lightdm to gdm if it is fixed.)
I did use nVidia proprietary driver because my nVidia card did not support by open source driver and only have software render, which is too slow to use on Krita.
Saturday, June 20, 2015
OpenShift 3 (Fedora 22 Host + Vagrant with libvirt + OpenShift 3 Docker)
Red Ha recently introduced OpenShift 3, which is different from OpenShift 2 by adopting Docker + Kubernetes. Following doc covers some note I took during experimenting with it as it seem there is still some gaps in online docs that is different from my installation experience (I may just miss something too)
Update (06/27/2015): The latest binary v1.0.0 from OpenShift 3 along with latest CentOS patch (that includes Docker 1.6.2 along with necessary SELinux Policy), its example seem to be working okay. But I found that race condition may happen during a lot of image pull (but maybe it is just because I have a single all in one instance)
The code can be found at here:
The OS in this docs is Fedora 22 WorkStation version, so some settings will be oriented with Fedora specific settings.
Install Vagrant + libvirt (one may check this doc for more detail http://fedoramagazine.org/running-vagrant-fedora-22/):
Install Vagrant Plugin (details can be found at here: https://github.com/openshift/vagrant-openshift)
(Optional: Install Docker for local debug)
Install nfs-server packages (one may find the detail docs at here: http://www.server-world.info/en/note?os=Fedora_22&p=nfs)
Install firewall rule for vagrant + libvirt NFS mount (as vagrant + libvirt use NFS mount for share the data between host and VM, it is a requirement), following commands must be run even if you choose to disable your firewall (I am not sure why, but without following rules, NFS will not happen even if your firewall is off), (detail explanation can be found at here http://fedoramagazine.org/running-vagrant-fedora-22/):
Install git (for cloing the repository):
For people who like single line command:
git clone https://github.com/openshift/origin.git
Move into the directory and create a CentOS 7 configuration file instead of default Fedora 21 ones (the reason is Fedora 7 seem to be close its end of life, so thought to choose a long support edition)
Please wait until the log is print out listening before proceed to next steps
On may then use the web browser to visit the OpenShift console with VM_ADDRESS:8443 in the host machine, one may found the VM_ADDRESS by using following command in the VM
Above should print out docker registry info (please check until Endpoint parameter is no longer <NONE>)
Use following commands to log in as a sample user
Use following commands then to create a javaee sample application with WildFly (please check the original blog: http://blog.arungupta.me/openshift-v3-getting-started-javaee7-wildfly-mysql/)
One then should be able to use describe service
Output:
Update (06/27/2015): The latest binary v1.0.0 from OpenShift 3 along with latest CentOS patch (that includes Docker 1.6.2 along with necessary SELinux Policy), its example seem to be working okay. But I found that race condition may happen during a lot of image pull (but maybe it is just because I have a single all in one instance)
The code can be found at here:
https://github.com/openshift/origin
The OS in this docs is Fedora 22 WorkStation version, so some settings will be oriented with Fedora specific settings.
Install Vagrant + libvirt (one may check this doc for more detail http://fedoramagazine.org/running-vagrant-fedora-22/):
sudo dnf install vagrant vagrant-libvirt
Install Vagrant Plugin (details can be found at here: https://github.com/openshift/vagrant-openshift)
vagrant plugin install vagrant-openshift
(Optional: Install Docker for local debug)
sudo dnf install docker
Install nfs-server packages (one may find the detail docs at here: http://www.server-world.info/en/note?os=Fedora_22&p=nfs)
sudo dnf install nfs-utils
Install firewall rule for vagrant + libvirt NFS mount (as vagrant + libvirt use NFS mount for share the data between host and VM, it is a requirement), following commands must be run even if you choose to disable your firewall (I am not sure why, but without following rules, NFS will not happen even if your firewall is off), (detail explanation can be found at here http://fedoramagazine.org/running-vagrant-fedora-22/):
sudo firewall-cmd --permanent --add-service=nfs &&sudo firewall-cmd --permanent --add-service=rpc-bind &&sudo firewall-cmd --permanent --add-service=mountd &&sudo firewall-cmd --reload
Install git (for cloing the repository):
sudo dnf install git
For people who like single line command:
sudo -y dnf install vagrant vagrant-libvirt git docker nfs-utils &&Move to a folder where OpenShift source can be stored and clone it down:
sudo firewall-cmd --permanent --add-service=nfs &&
sudo firewall-cmd --permanent --add-service=rpc-bind &&
sudo firewall-cmd --permanent --add-service=mountd &&
sudo firewall-cmd --reload && vagrant plugin install vagrant-openshift
git clone https://github.com/openshift/origin.git
Move into the directory and create a CentOS 7 configuration file instead of default Fedora 21 ones (the reason is Fedora 7 seem to be close its end of life, so thought to choose a long support edition)
cd originCheck the configuration:
vagrant origin-init --stage inst --os centos7 openshift
cat .vagrant-openshift.json | grep centos7Should Produce following:
"os": "centos7",
"box_name": "centos7_inst",
"box_url": "http://mirror.openshift.com/pub/vagrant/boxes/openshift3/centos7_virtualbox_inst.box"
"box_name": "centos7_base",
"box_url": "http://mirror.openshift.com/pub/vagrant/boxes/openshift3/centos7_libvirt_inst.box"
"ssh_user": "centos"
"ssh_user": "centos"
Proceed to stand out the vagrant box (in the origin folder above):
vagrant up
It should continues to stand out the machine, enter password as needed for the network settings and NFS mount. If it is has errors on NFS mount, please use the above docs and other info to help debug. Once the machine completes success, proceed to ssh into the VM (and type password as necessary):
vagrant ssh
Once ssh into the machine, we can pull the image to ensure they are latest
. /data/src/examples/sample-app/pullimages.sh
Download and start up the necessary binary for OpenShift v3
# Download the binary
curl -L https://github.com/openshift/origin/releases/download/v1.0.0/openshift-origin-v1.0.0-67617dd-linux-amd64.tar.gz | tar xzv
# Change to root user (for below scripts)
sudo su -
# http://fabric8.io/guide/openShiftInstall.html
export OPENSHIFT_MASTER=https://$(hostname -I | cut -d ' ' -f1):8443
echo $OPENSHIFT_MASTER
export PATH=$PATH:$(pwd)
# Create the log directory in advance
mkdir -p /var/lib/openshift/
chmod 755 /var/lib/openshift
# Remove previous generated config if anyrm -rf openshift.local.config
nohup openshift start \
--cors-allowed-origins='.*' \
--master=$OPENSHIFT_MASTER \
--volume-dir=/var/lib/openshift/openshift.local.volumes \
--etcd-dir=/var/lib/openshift/openshift.local.etcd \
> /var/lib/openshift/openshift.log &
tail -f /var/lib/openshift/openshift.log
Please wait until the log is print out listening before proceed to next steps
On may then use the web browser to visit the OpenShift console with VM_ADDRESS:8443 in the host machine, one may found the VM_ADDRESS by using following command in the VM
ifconfig
Should have similar output at eth0 (other ones are for Docker and OpenShift)
eth0: flags=4163<UP,BROADCAST,RUNNING,MULTICAST> mtu 1500In the Vagrant VM, start following command,
inet 192.168.121.169 netmask 255.255.255.0 broadcast 192.168.121.255
inet6 fe80::5054:ff:fec6:ba8d prefixlen 64 scopeid 0x20<link>
ether 52:54:00:c6:ba:8d txqueuelen 1000 (Ethernet)
RX packets 184375 bytes 442794303 (422.2 MiB)
RX errors 0 dropped 11 overruns 0 frame 0
TX packets 119825 bytes 15028821 (14.3 MiB)
TX errors 0 dropped 0 overruns 0 carrier 0 collisions 0
# Link the current config
mkdir -p ~/.kube
ln -s `pwd`/openshift.local.config/master/admin.kubeconfig ~/.kube/config
export CURL_CA_BUNDLE=`pwd`/openshift.local.config/master/ca.crt
sudo chmod a+rwX openshift.local.config/master/admin.kubeconfig
sudo chmod +r openshift.local.config/master/openshift-registry.kubeconfig
# Create local registryoadm registry --create --credentials=openshift.local.config/master/openshift-registry.kubeconfig --config=openshift.local.config/master/admin.kubeconfig
# Check the statusoc describe service docker-registry --config=openshift.local.config/master/admin.kubeconfig
Above should print out docker registry info (please check until Endpoint parameter is no longer <NONE>)
Use following commands to log in as a sample user
oc login --certificate-authority=openshift.local.config/master/ca.crt -u test-admin -p test-admin
Use following commands then to create a javaee sample application with WildFly (please check the original blog: http://blog.arungupta.me/openshift-v3-getting-started-javaee7-wildfly-mysql/)
# Create new project
oc new-project test --display-name="OpenShift 3 WildFly" --description="This is a test sample project to test WildFly on OpenSHift 3"
# Create new app
oc new-app -f https://raw.githubusercontent.com/bparees/javaee7-hol/master/application-template-jeebuild.json
# Trace the build
oc build-logs jee-sample-build-1
The above command should yield something similar to following (may need to wait for few minutes):
I0628 04:40:08.327578 1 sti.go:388] Copying built war files into /wildfly/standalone/deployments for later deployment...
I0628 04:40:08.352066 1 sti.go:388] Copying config files from project...
I0628 04:40:08.353790 1 sti.go:388] ...done
I0628 04:40:16.662515 1 sti.go:96] Using provided push secret for pushing 172.30.6.81:5000/test/jee-sample image
I0628 04:40:16.662562 1 sti.go:99] Pushing 172.30.6.81:5000/test/jee-sample image ...
I0628 04:40:24.410955 1 sti.go:103] Successfully pushed 172.30.6.81:5000/test/jee-sample
oc describe services
Output:
NAME LABELS SELECTOR IP(S) PORT(S)
frontend template=application-template-jeebuild name=frontend 172.30.88.128 8080/TCP
mysql template=application-template-jeebuild name=mysql 172.30.250.39 3306/TCP
One may use ssh tunnel to post the website on your local workstation by opening up a new terminal, move into the origin code directory (the ip may be different front above, please check the ip for frontend service and change as necessary)
From local workstation (not the vagrant box), use following
From local workstation (not the vagrant box), use following
cd origin
vagrant ssh -- -L 9999:172.30.167.74:8080
The IP and Port depends on the output above, 9999 is the local machine available port. One may then open localhost:9999 in local workstation browser and it should open the Java app.
Clean up everything (it will remove everything, please be warned)
Clean up everything (it will remove everything, please be warned)
oc delete pods,services,projects --all
Shutdown the vagrant boxes by using the command on host workstation:
Or use the following command on host workstation to destroy the VM (in case something goes wrong):
vagrant halt
Or use the following command on host workstation to destroy the VM (in case something goes wrong):
vagrant destroy --force
Sunday, May 10, 2015
Happy Mother's Day Year 2015
Mother Card 05092015 by danil-ko on DeviantArt
Happy Mother's Day Year 2015.
Completed in Krita.
Following is some of concept art before starting it.Start to try out new ways to color things and correct anatomy problems.
Concept Art 05092015 by danil-ko on DeviantArt
Sunday, December 28, 2014
Happy New Year 2015
Happy New Year 2015 by danil-ko on DeviantArt
Artwork is completed in Krita.
Hope you guys like it and wish you guys happy New Year 2015.
Thanks.
Sincerely,
Danil
Sunday, September 7, 2014
CentOS Docker Image with Tomcat 7
Start to experiment docker. However, most blog posts currently used example with Ubuntu and Tomcat. I am more interest in a combination of Fedora/CentOS/RHEL example with Tomcat 7. So I decide to do my own.
Instead of using a pre-build images, I decide I will experiment with building my own centos image.
Thanks for the contribution on GitHub from https://github.com/blalor/docker-centos-base
I modified it a little.
Following is the step I took (following steps do not assume any OS as base OS may not be centos as some people may want to produce one even without install on the hardware)
The overall summary is following:
Use Vagrant and VirtualBox to setup a minimum centos machine -> Use the minimum virtual machine to build a supermin Docker base image -> Use host to build docker image
Please download vagrant
https://www.vagrantup.com/
Please then download VirtualBox
https://www.virtualbox.org/
Installed both
Execute following
# On a web browser, do
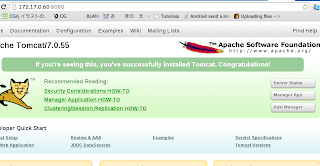
172.17.0.60:8080
The tomcat webpage will show up
To clean up the container, one may run
To clean up the image, after the above command one may run
Instead of using a pre-build images, I decide I will experiment with building my own centos image.
Thanks for the contribution on GitHub from https://github.com/blalor/docker-centos-base
I modified it a little.
Following is the step I took (following steps do not assume any OS as base OS may not be centos as some people may want to produce one even without install on the hardware)
The overall summary is following:
Use Vagrant and VirtualBox to setup a minimum centos machine -> Use the minimum virtual machine to build a supermin Docker base image -> Use host to build docker image
Please download vagrant
https://www.vagrantup.com/
Please then download VirtualBox
https://www.virtualbox.org/
Installed both
Execute following
mkdir centos_docker_builder;
cd centos_docker_builder;
vagrant box add centos65-x86_64-20140116 https://github.com/2creatives/vagrant-centos/releases/download/v6.5.3/centos65-x86_64-20140116.box
cat << EOF > Vagrantfile
# -*- mode: ruby -*-
# vi: set ft=ruby :
# Vagrantfile API/syntax version. Don't touch unless you know what you're doing!
VAGRANTFILE_API_VERSION = "2"
Vagrant.configure(VAGRANTFILE_API_VERSION) do |config|
config.vm.box = "centos65-x86_64-20140116"
# config.vm.provision "shell", path: "auto_build_setup.sh"
config.vm.synced_folder ".", "/vagrant", :mount_options => ["dmode=777","fmode=666"]
end
EOF
cat << EOFF > start-tomcat.sh
#!/bin/bash
# From https://github.com/arcus-io/docker-tomcat7
ADMIN_USER=${ADMIN_USER:-admin}
ADMIN_PASSWORD=${ADMIN_PASSWORD:-admin}
MAX_UPLOAD_SIZE=${MAX_UPLOAD_SIZE:- 52428800}
cat << EOF > /opt/apache-tomcat/conf/tomcat-users.xml
EOF
if [ -f "/opt/apache-tomcat/webapps/manager/WEB-INF/web.xml" ];
then
chmod 664 /opt/apache-tomcat/webapps/manager/WEB-INF/web.xml
sed -i "s^.*max-file-size.*^\t${MAX_UPLOAD_SIZE} ^g" /opt/apache-tomcat/webapps/manager/WEB-INF/web.xml
sed -i "s^.*max-request-size.*^\t${MAX_UPLOAD_SIZE} ^g" /opt/apache-tomcat/webapps/manager/WEB-INF/web.xml
fi
/bin/sh -e /opt/apache-tomcat/bin/catalina.sh run
EOFF
wget http://www.carfab.com/apachesoftware/tomcat/tomcat-7/v7.0.55/bin/apache-tomcat-7.0.55.tar.gz
cat << EOF > build_centos.sh
#!/bin/bash
set -e
## Following script is coming from GitHub from https://github.com/blalor/docker-centos-base
## Thanks for the code
## requires running as root because filesystem package won't install otherwise,
## giving a cryptic error about /proc, cpio, and utime. As a result, /tmp
## doesn't exist.
[ $( id -u ) -eq 0 ] || { echo "must be root"; exit 1; }
tmpdir=$( mktemp -d )
trap "echo removing ${tmpdir}; rm -rf ${tmpdir}" EXIT
febootstrap \
-u http://mirrors.mit.edu/centos/6.5/updates/x86_64/ \
-i centos-release \
-i yum \
-i iputils \
-i tar \
-i which \
-i http://mirror.pnl.gov/epel/6/i386/epel-release-6-8.noarch.rpm \
centos65 \
${tmpdir} \
http://mirrors.mit.edu/centos/6.5/os/x86_64/
febootstrap-run ${tmpdir} -- sh -c 'echo "NETWORKING=yes" > /etc/sysconfig/network'
## set timezone of container to UTC
febootstrap-run ${tmpdir} -- ln -f /usr/share/zoneinfo/Etc/UTC /etc/localtime
febootstrap-run ${tmpdir} -- yum clean all
## xz gives the smallest size by far, compared to bzip2 and gzip, by like 50%!
febootstrap-run ${tmpdir} -- tar -cf - . | xz > centos65.tar.xz
EOF
chmod a+x build_centos.sh
cat << EOF > Dockerfile
From scratch
MAINTAINER Danil Ko
ADD centos6.5.tar.xz /
# Need to update additional selinux packages due to https://bugzilla.redhat.com/show_bug.cgi?id=1098120
RUN yum -y install yum install java-1.7.0-openjdk-devel wget http://mirror.centos.org/centos/6.5/centosplus/x86_64/Packages/libselinux-2.0.94-5.3.0.1.el6.centos.plus.x86_64.rpm http://mirror.centos.org/centos/6.5/centosplus/x86_64/Packages/libselinux-utils-2.0.94-5.3.0.1.el6.centos.plus.x86_64.rpm
# Use copy to preserve the the tar file without untar
COPY apache-tomcat-7.0.55.tar.gz /tmp/
RUN cd /opt; tar -xzf /tmp/apache-tomcat-7.0.55.tar.gz; mv /opt/apache-tomcat* /opt/apache-tomcat; rm /tmp/apache-tomcat-7.0.55.tar.gz;
ADD start-tomcat.sh /usr/local/bin/start-tomcat.sh
EXPOSE 8080
CMD ["/bin/sh", "-e", "/usr/local/bin/start-tomcat.sh"]
EOF
vagrant up
vagrant ssh "cd /vagrant; . build_centos.sh"
vagrant destroy
# Move the centos_docker_builder folder to a docker host machine, in this example, it is the same machine
# Also download the tomcat file and name it as apache-tomcat-7.0.55.tar.gz
docker build -t centosimage .
# Run as a background daemon process and with the container name webtier
docker run -d --name webtier centosimage
# On a separate terminal, run (consider one only have the webtier running, otherwise, one will use docker ps -a to find the container id and use docker inspect )
docker inspect -f '{{ .NetworkSettings.IPAddress }}' webtier | grep IP
"IPAddress": "172.17.0.60",
"IPPrefixLen": 16,
# On a web browser, do
172.17.0.60:8080
The tomcat webpage will show up

To clean up the container, one may run
docker stop webtier; docker rm webtier;
To clean up the image, after the above command one may run
docker rmi centosimage;
Sunday, July 13, 2014
OpenShift Git History CLean Up
Recently, I found that git history start to fill up the allowed disk space in the gear as I was always deployed the build war files into the gear through git. And git store the entire binary delta every time when there is a new push.
So I start to look around for an ultimate solutions for the problem.
The first solution I encounter is from OpenShift online answer that describe how to clean up remote repo within the gear
https://www.openshift.com/forums/openshift/how-to-erase-all-history-from-a-git-repository-on-openshift-and-start-over-with
This solution works rather well. It removes the entire history. So I used for quite some time.
However, recently, I start to find that I should at least keep one history of backup, so I can rollback more easily (I found that binary-deployment seem to be harder to management then the git, maybe I did not understand the full feature yet). So I start to look for a git solution to clean up history.
Following is the other solution I found
http://stackoverflow.com/questions/11929766/how-to-delete-all-git-commits-except-the-last-five
It works very well. As it do remove the commit history and there reduce the size but also leave at least one history commit that I can revert back to.
What I found is that there is one thing I do not recognize in the solution, it will only impact local repository until there is a new commit to push the change along with these new repo data clean up to effect local repo. So without a new commit, if somebody clone it again, all history will still be there as the change is not in repo yet.
So I did some adjustment
It first did as in post to clean up the local repo, make a dummy commit, push the change to remote.
Thanks.
Sincerely,
Danil
So I start to look around for an ultimate solutions for the problem.
The first solution I encounter is from OpenShift online answer that describe how to clean up remote repo within the gear
https://www.openshift.com/forums/openshift/how-to-erase-all-history-from-a-git-repository-on-openshift-and-start-over-with
This solution works rather well. It removes the entire history. So I used for quite some time.
#!/bin/bash


# Clean up gear info

ssh $gear_ssh_url "cd git; rm -rf *.git; cd *.git; git init --bare; exit"

# Create bare repo to overwrite history (or do a new git clone, it is just I found it is faster just do a new repo and point remote repo)

git init

current_date=`date`

git commit -m "Automatic Push as of $current_date due to code change"

git add origin $gear_git_url

git push origin master -u --force
However, recently, I start to find that I should at least keep one history of backup, so I can rollback more easily (I found that binary-deployment seem to be harder to management then the git, maybe I did not understand the full feature yet). So I start to look for a git solution to clean up history.
Following is the other solution I found
http://stackoverflow.com/questions/11929766/how-to-delete-all-git-commits-except-the-last-five
It works very well. As it do remove the commit history and there reduce the size but also leave at least one history commit that I can revert back to.
What I found is that there is one thing I do not recognize in the solution, it will only impact local repository until there is a new commit to push the change along with these new repo data clean up to effect local repo. So without a new commit, if somebody clone it again, all history will still be there as the change is not in repo yet.
So I did some adjustment
#!/bin/bash


# Reference from the article http://stackoverflow.com/questions/11929766/how-to-delete-all-git-commits-except-the-last-five

current_branch="$(git branch --no-color | cut -c3-)" ;

current_head_commit="$(git rev-parse $current_branch)" ;

echo "Current branch: $current_branch $current_head_commit" ;

# A B C D (D is the current head commit), B is new_history_begin_commit

new_history_begin_commit="$(git rev-parse $current_branch~1)" ;

echo "Recreating $current_branch branch with initial commit $new_history_begin_commit ..." ;

git checkout --orphan new_start $new_history_begin_commit ;

git commit -C $new_history_begin_commit ;

git rebase --onto new_start $new_history_begin_commit $current_branch;

git branch -d new_start ;


git reflog expire --expire=now --all;

git gc --prune=now;


# Still require a push for remote to take effect, otherwise the push will not go through as there is no change

if [ -f .invoke_update ];

then

      rm -rf .invoke_update;

else

      touch .invoke_update;

fi


git add -A .;

current_date=`date`;

git commit -m "Force clean up history $current_date";

git push origin master --force;
It first did as in post to clean up the local repo, make a dummy commit, push the change to remote.
Thanks.
Sincerely,
Danil
Sunday, May 18, 2014
Happy Mother's Day 2014
Happy Mother Day 2014 by danil-ko on deviantART
After a week of delay, I finally ended up finish it.
Completed in MyPaint, Krita.
Thanks.
Sincerely,
Danil
Monday, February 17, 2014
Setup Eclipse Binary for Eclipse Official Website in Fedora 20
Following is a sample note to setup eclipse binary from Official Eclipse Website instead of using yum.
I chose to go down this path since yum is several revisions behind the official version.

Thanks.
Sincerely,
Danil
I chose to go down this path since yum is several revisions behind the official version.
# Install jdk development if not already, to prevent some strange behavior when compiling code
sudo yum -y install java-1.7.0-openjdk-devel.x86_64

# Download the eclipse from official site. (http://www.eclipse.org/)
wget http://www.eclipse.org/downloads/download.php?file=/technology/epp/downloads/release/kepler/SR1/eclipse-jee-kepler-SR1-linux-gtk-x86_64.tar.gz eclipse.tar.gz

# Unpackage it
mkdir -p eclipse
cd eclipse
tar -xvf ../eclipse.tar.gz

# Create eclipse.desktop file
cat > ~/eclipse.desktop <<"EOF"
[Desktop Entry]
Encoding=UTF-8
Name=Eclipse IDE
Exec=/opt/eclipse/eclipse
Icon=/opt/eclipse/icon.xpm
Type=Application
Categories=Development;
EOF

# Make it all permission
chmod a+wrx eclipse.desktop

cd ..

# Copy the binary to opt
sudo mv eclipse /opt/eclipse

# Make the desktop symbolic link
sudo ln /opt/eclipse/eclipse.desktop /usr/share/applications/eclipse.desktop
One should be able to see it in Search Menu
Thanks.
Sincerely,
Danil
Sunday, February 2, 2014
Happy New Year 2014
New Year 2014 by danil-ko on deviantART
Artwork is completed in Krita with GIMP to add texts and some enhancements.
Hope you guys like it and wish you guys happy New Year 2014.
Sincerely,
Danil
Hope you guys like it and wish you guys happy New Year 2014.
Sincerely,
Danil
Sunday, January 26, 2014
OpenShift Origin 3.0 with JBossews CentOS Installation
One can download the CentOS Minimal Image at
http://wiki.centos.org/Download
One of link is
http://mirror.trouble-free.net/centos/6.5/isos/x86_64/
Install the VM Image by using VirtualBox
https://www.virtualbox.org/
It is recommended to use
4GB Memory


Following needed to be set
Bridge Adapter

After the installation complete, run following bash script
(Host at github https://github.com/danilko/openshift-origin-3-jbossews-cartridge-installation)
#!/bin/bash

BROKER_OPENSHIFT_HOSTNAME=`hostname`
APP_OPENSHIFT_HOSTNAME=`echo ${BROKER_OPENSHIFT_HOSTNAME} | cut -d '.' -f2-`

# Make eth0 adapater enable during system start up
sed -i 's^ONBOOT=no^ONBOOT=yes^g' /etc/sysconfig/network-scripts/ifcfg-eth0

# Restart network service
service network restart

# Make current hostname to be resolvable
echo  -e "\n127.0.0.1 broker.platform.local" >> /etc/hosts

yum -y install java-1.7.0-openjdk-devel wget unzip

cd /tmp
wget http://dl.fedoraproject.org/pub/epel/6/x86_64/epel-release-6-8.noarch.rpm
rpm -Uvh epel-release-6*.rpm;
cat > /etc/yum.repos.d/openshift-origin-deps.repo <<"EOF"
[openshift-origin-deps]
name=OpenShift Origin Dependencies - EL6
baseurl=http://mirror.openshift.com/pub/origin-server/release/3/rhel-6/dependencies/$basearch/
gpgcheck=0
EOF

yum install -y ruby193-ruby unzip curl bind httpd-tools puppet augeas

# Install default config file
cat > ~/.openshift/oo-install-cfg.yml <<"EOF"
---
Version: 0.0.1
Description: This is the configuration file for the OpenShift Installer.
Deployment:
  DNS:
    component_domain: broker.platform.local
    register_components: Y
    app_domain: platform.local
  Hosts:
  - ip_addr: 127.0.0.1
    named_ip_addr: 127.0.0.1
    user: root
    host: broker.platform.local
    state: new
    ip_interface: eth0
    roles:
    - msgserver
    - dbserver
    - broker
    - node
    ssh_host: localhost
Vendor: OpenShift Origin Community
Subscription:
  type: yum
  jenkins_repo_base: http://pkg.jenkins-ci.org/redhat
  repos_base: https://mirror.openshift.com/pub/origin-server/release/3/rhel-6
Name: OpenShift Installer Configuration
EOF

sh <(curl -s https://install.openshift.com/) -w origin_deploy

# Update the DNS of current host
nsupdate -k /var/named/Kplatform.local*.key
server ${BROKER_OPENSHIFT_HOSTNAME}
update delete ${BROKER_OPENSHIFT_HOSTNAME} A
update add  180 A 127.0.0.1
send
quit

######################################
## SSL Cert Generation
######################################

mkdir -p /tmp/pki
cd /tmp/pki

cat >  platform.crt.config <<"EOF"
 RANDFILE               = $ENV::HOME/.rnd

 [ req ]
 default_bits           = 1024
 default_keyfile        = keyfile.pem
 distinguished_name     = req_distinguished_name
 attributes             = req_attributes
 prompt                 = no
 output_password        = changeme

 [ req_distinguished_name ]
 C                      = US
 ST                     = CA
 L                      = SAN JOSE
 O                      = PLATFORM
 OU                     = PLATFORM
 CN                     = *.platform.local
 emailAddress           = changeme

 [ req_attributes ]
 challengePassword              = changeme
EOF

# Generate a new key that lasts 365 days
openssl req -batch -x509 -nodes -days 365 -newkey rsa:2048 -keyout platform.key -out platform.crt -config platform.crt.config

# Backup old certificate and key
\cp -rf  /etc/pki/tls/certs/localhost.crt /etc/pki/tls/certs/localhost.crt.bak
\cp -rf  /etc/pki/tls/private/localhost.key /etc/pki/tls/private/localhost.key.bak

# Copy certificate and key
\cp -rf platform.crt /etc/pki/tls/certs/localhost.crt
\cp -rf platform.key /etc/pki/tls/private/localhost.key

# Setup so the serveralias also contain *platform.local
sed -i 's^ServerAlias localhost^ServerAlias localhost *.platform.local^g' /etc/httpd/conf.d/000001_openshift_origin_node.conf
sed -i 's^ServerAlias localhost^ServerAlias localhost *.platform.local^g' /etc/httpd/conf.d/000002_openshift_origin_broker_proxy.conf

# Get certificate through opnenssl
# Do not need since the cert is auto generated
#echo -n | openssl s_client -connect broker.platform.local:443 | sed -ne '/-BEGIN CERTIFICATE-/,/-END CERTIFICATE-/p' > platform.crt

# Import to java keystore to prevent ssl problem
keytool -import -trustcacerts -keystore /usr/lib/jvm/java-1.7.0-openjdk-1.7.*.x86_64/jre/lib/security/cacerts -storepass changeit -noprompt -alias platform_cert -file /tmp/pki/platform.crt

cd  /tmp
rm -rf /tmp/pki

# Restart httpd
service httpd restart

# Ensure cgconfig and cgred is on to make sure gear config
/sbin/chkconfig cgconfig on
/sbin/chkconfig cgred on

reboot now
After the reboot, run the following bash script
#!/bin/bash

cd /tmp

TOMCAT7_VER=7.0.50
TOMCAT6_VER=6.0.37
MAVEN_VER=3.1.1

# Download binary
wget http://supergsego.com/apache/tomcat/tomcat-7/v${TOMCAT7_VER}/bin/apache-tomcat-${TOMCAT7_VER}.tar.gz
wget http://apache.mirrors.hoobly.com/tomcat/tomcat-6/v${TOMCAT6_VER}/bin/apache-tomcat-${TOMCAT6_VER}.tar.gz
wget http://apache.petsads.us/maven/maven-3/3.1.1/binaries/apache-maven-${MAVEN_VER}-bin.tar.gz
wget https://github.com/openshift/origin-server/archive/openshift-origin-release-3.zip

# Untar/Unzip binaries
tar -xvf apache-tomcat-${TOMCAT7_VER}.tar.gz
tar -xvf apache-tomcat-${TOMCAT6_VER}.tar.gz
tar -xvf apache-maven-${MAVEN_VER}-bin.tar.gz
unzip openshift-origin-release-3.zip

######################################
## Install Maven
######################################
\cp -rf apache-maven-${MAVEN_VER} /etc/alternatives/maven

# Setup maven path system wide
echo -e 'export M2_HOME=/etc/alternatives/maven\nexport PATH=${M2_HOME}/bin:${PATH}'  > /etc/profile.d/maven.sh

source /etc/profile.d/maven.sh

mvn -v

######################################
## Install JBossews
######################################
# Copy jbossews/tomcat to correct location
\cp -rf apache-tomcat-${TOMCAT6_VER} /etc/alternatives/jbossews-1.0
\cp -rf apache-tomcat-${TOMCAT7_VER} /etc/alternatives/jbossews-2.0

# Copy openshift cartridges
\cp -rf origin-server-openshift-origin-release-3/cartridges/openshift-origin-cartridge-jbossews /usr/libexec/openshift/cartridges/jbossews

chmod a+x /usr/libexec/openshift/cartridges/jbossews/bin/*

# Install the cartridge
oo-admin-cartridge -a install -s /usr/libexec/openshift/cartridges/jbossews

# Clear broker cache
oo-admin-broker-cache -c

# Clean up folder
rm -rf origin-server-openshift-origin-release-3
rm -rf apache-maven-${MAVEN_VER}
rm -rf  apache-tomcat-${TOMCAT7_VER}
rm -rf  apache-tomcat-${TOMCAT6_VER}

######################################
## Change Default User Gear Size all to medium
######################################

# Resource limit file
RESOURCE_LIMIT_CONFIG_FILE=/etc/openshift/resource_limits.conf
sed -i 's^node_profile=small^node_profile=medium^g' ${RESOURCE_LIMIT_CONFIG_FILE}
sed -i 's^quota_blocks=1048576^quota_blocks=2097152^g' ${RESOURCE_LIMIT_CONFIG_FILE}
sed -i 's^quota_files=80000^quota_files=999999^g' ${RESOURCE_LIMIT_CONFIG_FILE}
sed -i 's^memory_limit_in_bytes=536870912       # 512MB^memory_limit_in_bytes=1073741824       # 1024MB^g' ${RESOURCE_LIMIT_CONFIG_FILE}
sed -i 's^memory_memsw_limit_in_bytes=641728512 # 512M + 100M (100M swap)^memory_memsw_limit_in_bytes=1178599424 # 1024M + 100M (100M swap)^g' ${RESOURCE_LIMIT_CONFIG_FILE}

# Set the file connection limit
RESOURCE_LIMIT_CONFIG_FILE=/etc/security/limits.conf
sed -i 's^#End of file^^g' ${RESOURCE_LIMIT_CONFIG_FILE}

echo -e "\n* soft nofile 32000\n* hard nofile 32000" >> ${RESOURCE_LIMIT_CONFIG_FILE}
echo -e "\n#End of file" >> ${RESOURCE_LIMIT_CONFIG_FILE}

# Reboot node services
service mcollective restart
oo-cgroup-enable --with-all-containers
oo-pam-enable --with-all-containers
oo-admin-ctl-tc restart

sed -i 's^"small"^"medium"^g' /etc/openshift/broker.conf

# Change demo user gear size
oo-admin-ctl-user --removegearsize small -l demo
oo-admin-ctl-user --addgearsize medium -l demo

# Clear broker cache
oo-admin-broker-cache -c

######################################
## Setup rhc tool
######################################

# Setup rhc tool
gem install rhc
echo yes | rhc setup --server=broker.platform.local -l demo -p changeme -k –no-create-token
By the end, one should have a working OpenShift configuration with JBossews Cartridges enable

Thanks.
Sincerely,
Danil
Sunday, February 10, 2013
Jersey + Multipart + Maven
I thought I should write about a problem that takes a long time for me to solve in case I forget about it.
I looked through tutorials and other articles to learn about Jersey Multipart. However, I ran into issues with missing dependency by following these tutorials. I finally solved it by setting up my maven POM file in the following way:
<dependencies>
<dependency>
<groupId>junit</groupId>
<artifactId>junit</artifactId>
<version>3.8.1</version>
<scope>test</scope>
</dependency>
<dependency>
<groupId>com.sun.jersey</groupId>
<artifactId>jersey-server</artifactId>
<version>1.9</version>
</dependency>
<dependency>
<groupId>com.sun.jersey.contribs</groupId>
<artifactId>jersey-multipart</artifactId>
<version>1.9</version>
</dependency>
<dependency>
<groupId>com.sun.jersey</groupId>
<artifactId>jersey-json</artifactId>
<version>1.9</version>
</dependency>
<dependency>
<groupId>org.jvnet.mimepull</groupId>
<artifactId>mimepull</artifactId>
<version>1.9</version>
</dependency>
</dependencies>
In short, problems seem to come from version differences across jersey libraries as well as mimepull libraries. All libraries should be the same version. So even if other Jersey libraries already had 1.14 version, it should be safer to use 1.9 version since it was the latest version for mimepull.
The missing dependency error messages were not too informative at this case.
Thanks to authors of original articles and their comments who contribute to the solution.
Hope it helps others.
中文翻譯:
最近花了不少時間解決了一個問題, 想說先把解決方案寫下來以免忘記.
之前幾日在網路上尋找關於Jersey Multipart的教學. 在讀完許多教學後自己寫了一個簡單的範例.但是在Deploy時卻遇到missing dependency的問題. 最後終於在把Maven的POM檔做出以下修改後解決了問題:
<dependencies>
<dependency>
<groupId>junit</groupId>
<artifactId>junit</artifactId>
<version>3.8.1</version>
<scope>test</scope>
</dependency>
<dependency>
<groupId>com.sun.jersey</groupId>
<artifactId>jersey-server</artifactId>
<version>1.9</version>
</dependency>
<dependency>
<groupId>com.sun.jersey.contribs</groupId>
<artifactId>jersey-multipart</artifactId>
<version>1.9</version>
</dependency>
<dependency>
<groupId>com.sun.jersey</groupId>
<artifactId>jersey-json</artifactId>
<version>1.9</version>
</dependency>
<dependency>
<groupId>org.jvnet.mimepull</groupId>
<artifactId>mimepull</artifactId>
<version>1.9</version>
</dependency>
</dependencies>
總結是Jersey libraries跟mimepull的版本必須要相同. 不然會出現Missing Dependency的問題. 所以即使Jersey libraries已有1.14版, 這裡必須使用1.9版, 因為mimepull只有到1.9版.
完全沒想到missing dependency會跟版本有相關性.
希望這篇文章可以幫到需要的朋友們.
Original Tutorial Site:
http://www.mkyong.com/webservices/jax-rs/file-upload-example-in-jersey/
Sincerely,
Danil
Subscribe to:
Posts (Atom)